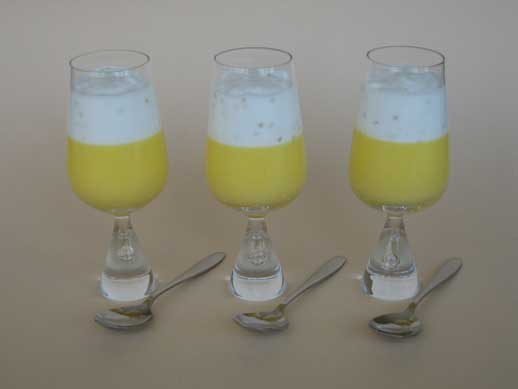
mango coconut pudding with coconut sago
I discovered Indira and her lovely blog Mahanandi on IMBB. There, I read about her event “Jihva for Ingredients” and was struck by the poetic meaning of the word “Jihva”. In Sanskrit, Jihva means taste, desire and deep longing. The theme for Jihva for Ingredients #1 is mango – a fruit that I have always loved. Whether it’s mangoes from Mexico, Haiti, the Caribbean, South America or the Philippines, I deeply appreciate this fruit. I was surprised to learn, though, that there are over 1,000 varieties of mangoes in the world. When you are selecting mangoes, ripeness can be determined by smelling the end or by squeezing the fruit – it should be slightly soft to the touch.My first thought was to make mango pudding, which resembles a cross between a jelly and a pannacotta. Mango pudding is something that I always make room for when I go for dim sum. It is made in a variety of ways: sometimes with cream, sometimes with diced mango, and sometimes with agar-agar. The recipe that I made, mango coconut pudding with coconut sago, combines mango with coconut – two flavours that compliment each other perfectly. It is a dessert that counterbalances the creamy texture of mango pudding with the small pearls of tapioca in coconut milk.
Note: Since mangoes are not always in season, I suggest using pre-made mango puree in desserts, as the puree has a more consistent taste and sweetness. Many bakeries, restaurants and hotels use puree because it is also cost effective. Mango puree is often sold in specialty and ethnic food stores. I have found mango puree at Loblaws/The Real Canadian Superstore, for all you Canadians.
mango coconut pudding
500ml mango puree
100g sour cream
250 ml heavy cream
400ml whole milk
100 ml coconut milk
90g sugar
10g gelatin
1. Mix mango puree and sour cream together in a small bowl and set aside.
2. In a small bowl add gelatin and 2 Tbsp of water; let it sit for 5 minutes before using.
3. In a small pot, add heavy cream, whole milk, coconut milk and sugar and bring to a gentle boil. Add the gelatin to the cream mixture and stir until dissolved.
4. Let the mixture cool a bit; add the mango and sour cream mixture and then mix until fully combined.
5. Pour the mixture into glasses, cups or ramekins, and chill until set.
coconut sago
15g sago tapioca pearls
250ml coconut milk
250ml whole milk
60g sugar
1. In a small pot or saucepan add whole milk and tapioca pearls. Bring the mixture to a boil, reduce heat to low and simmer for approximately 30 minutes.
2. Add sugar to the mixture and simmer for another 10 minutes.
3. Once the tapioca mixture is finished cooking, stir in coconut milk and simmer for 5 more minutes.
4. Let the mixture cool, then cover and refrigerate overnight. If the mixture is too thick, gradually add coconut milk or whole milk until you achieve the desired consistency.
5. Spoon coconut sago onto mango coconut pudding and enjoy.
Technorati Tags: Coconut, Jihva for Ingredients, Mango, Pudding


